Tuesday, December 11, 2018

[OBDF 110] Ceramic 3D Print *Warning: Adult Content*

This is the last blog entry for this course. For our final assignment, we had the privilege to work with ceramic 3D printing. Bryan, our instructor, has been researching and experimenting 3D printing with clay. He showed us some of the projects he worked on and I have been very fascinated by this technology, especially the one with the speaker moving the print bed to create patterns. The premise of this assignment is to design and fabricate a continuous flow ceramic 3D print. Sarah and I teamed up with Neeko and Stephan to brainstorm concepts as well as to create a 3D model.

4 adults were asked to come up with ideas for an object and we decided on number 7. Go figure.

The basic form of the tip modeled in Rhino.

The tip carefully sculpted in Meshmixer. We found it surprisingly hard to make a realistic tip from memory so we had to look up a reference photo.

We imported the mesh back to rhino and combined the tip with the lower shape. I learned two commands, MeshBooleanDifference and DeleteMeshFaces, while trying to remove the bottom surface of the tip.

The printing began after we sliced it in Slic3r to make sure it's hollow and all set. Bryan said our object had an 85% chance of falling over as it seemed very top-heavy. I realized this after seeing how small our base was.


As everyone expected, it did finally collapse, but I think we were all surprised by how far it got before the inevitable failure. Henry Ford once said, "Failure is simply the opportunity to begin again, this time more intelligently." I believe my group members and I know that in order for this design to work, we obviously need to have a much wider bottom. Also, perhaps some Viagra mixed with the clay might help.

I think our design is likely to succeed with a FDM printer as it takes longer for the clay to dry and firm up than melted plastic.

"Impotence"
I thought this was a fun, intriguing, and laid-back way to wrap up our class this semester. I hope you enjoyed reading these process blogs as much as I did writing them. 3D object design is definitely one of the paths I want to continue in my journey through ACAD. I look forward to take more classes with Bryan in the years to come!

Tuesday, November 27, 2018

[OBDF 110] First Time 3D Printing!

For the second last assignment, we were randomly put into groups of two in order to combine our concepts into one hybrid object for 3D printing. We have been asked to select three of each of our ideas and evaluate them based on the following criteria: function, form, self-supporting, and 3D printability. Then, we need to brainstorm a hybrid of two of our designs (one from each of us) and sketch concepts on paper. The next step is to model it using any of the software platforms we have explored, e.g. Rhino and Meshmixer. Lastly, we will be able to print our object on a Fused Deposition Modeling (FDM) printer.

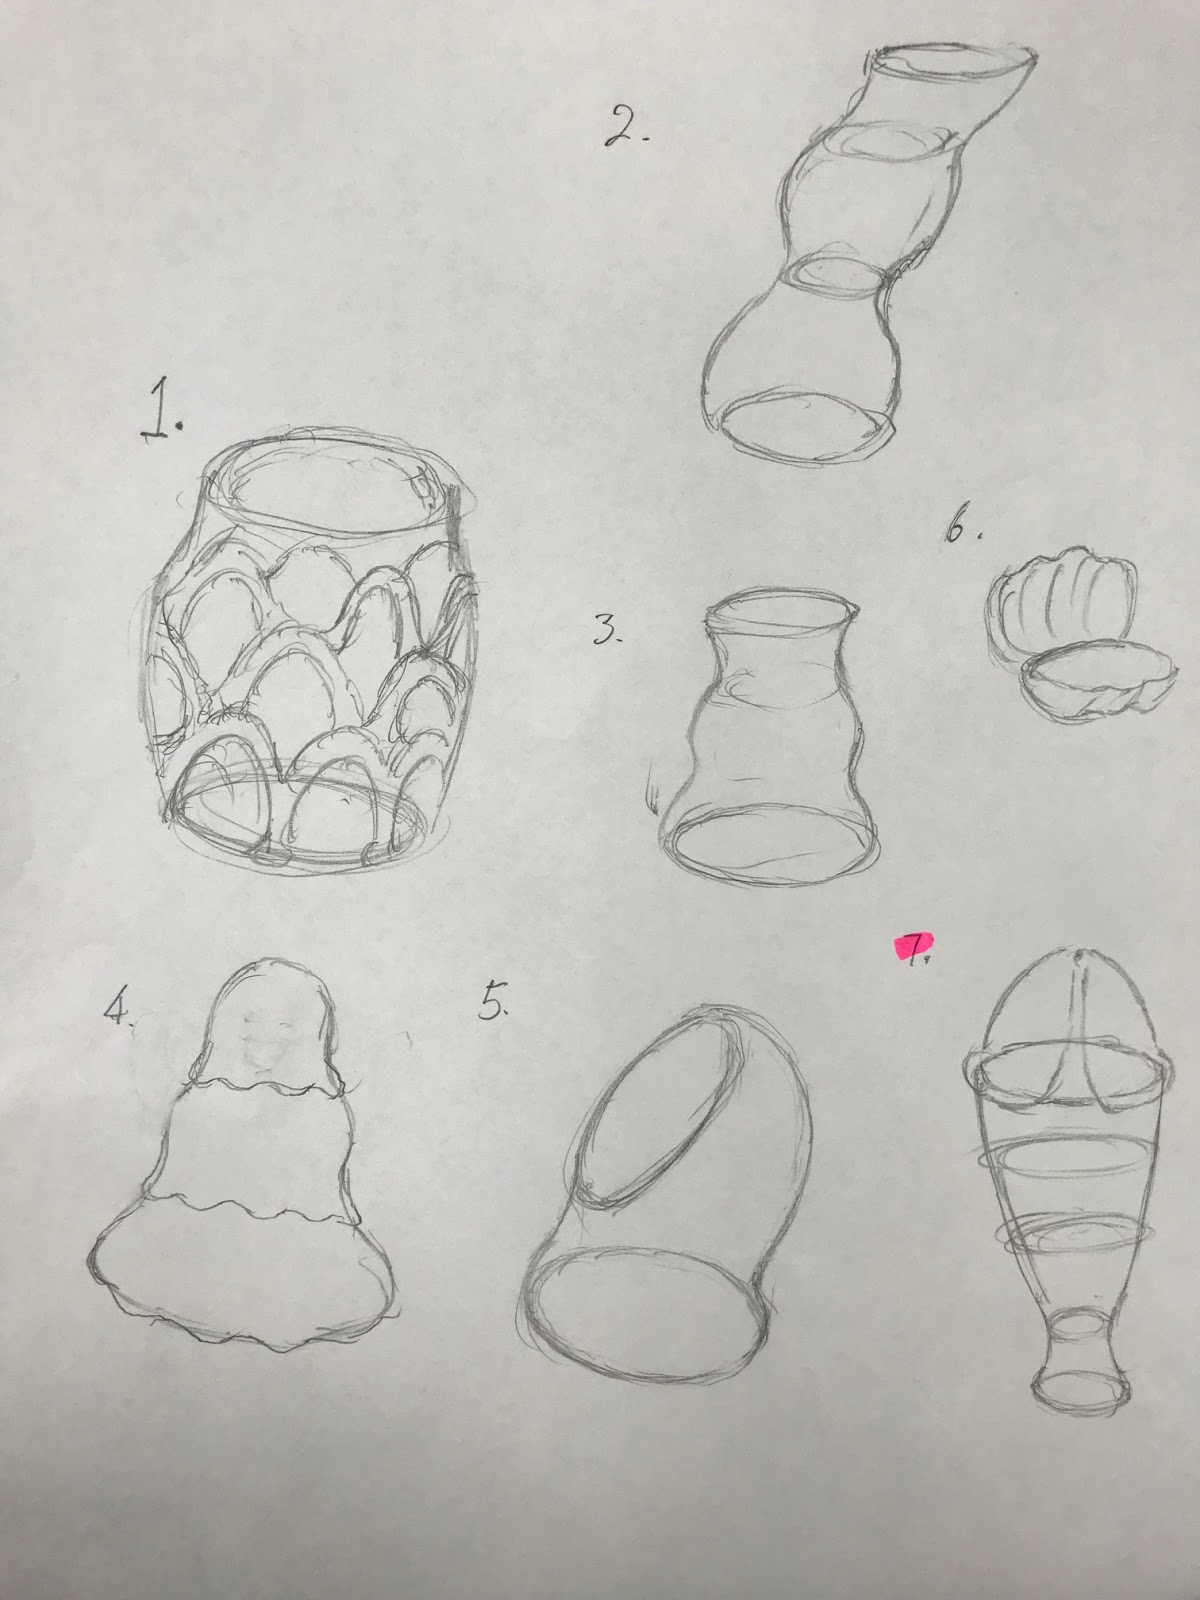
Preliminary sketches.
Most of our designs were abstract in the sense of function and form. We obviously picked the ones we thought were self-supporting, i.e. able to print without support material. We also picked ones that had less extreme angles and shelf-like structures so the likelihood for success in printing is greater. Since we were encouraged to manipulate our objects and go beyond just placing the two objects together, we adjusted some of our designs to increase said likelihood, e.g. beveled the horizontal to the vertical surfaces.

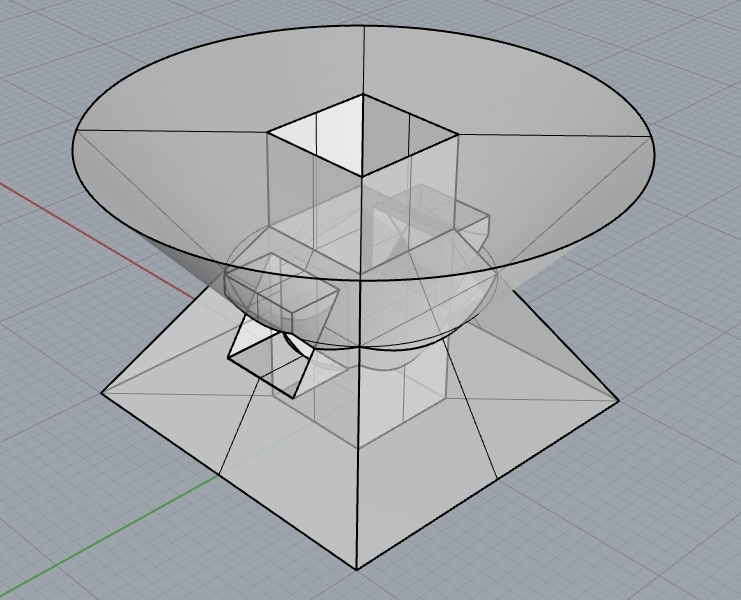
We decided to combine my ninth concept with Sarah's tenth design. We liked the dangerous, fantasy look and it can function as a vessel, weapon, crown, or an orb holder. We called our creation a "corb". Sarah's object has been repeated and placed on the pillars of my model in Rhino. The bottom surface of mine had been removed by accident and we figured to keep it as the hollowed out parts looked interesting.

My concept.
Sarah's concept.
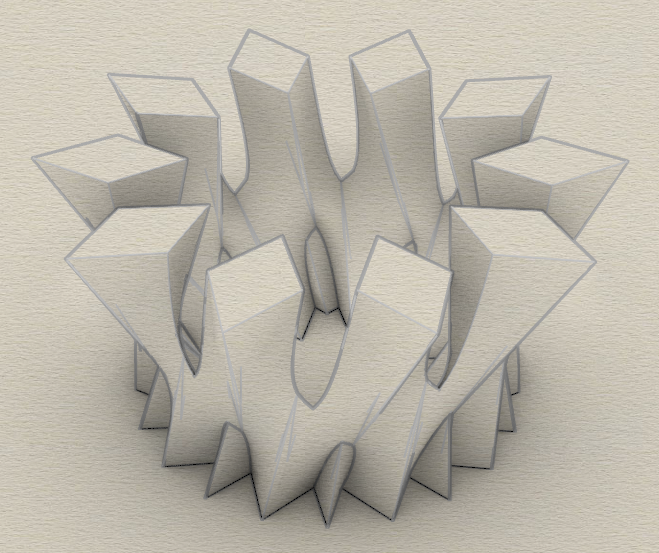
Combined and rendered in Rhino.
Top view.
Side view.
After using Rhino, we wanted to smooth out some of the edges and where our objects join. We did this in Meshmixer with the "RobustSmooth Brush" tool.

Sculpted in Meshmixer.
Before we can print our object, we have to open the file in Slic3r to set the print settings. We had to make sure the correct filament was selected, in this case, we are using "Generic PLA" which is a corn starch based biodegradable plastic. We also wanted the fill density to be at 0% so that our object will be hollow in order to save material. After all the proper settings have been applied, we exported the G-code file to a SD card and we were finally ready to print our object.

Printing has just begun. This is one of several 3D printers we have at ACAD.
This FDM printer was fairly easy to use, we were supposed to load our preferred colour of PLA filament and have the printer preheat as well as calibrate. Then, we just let it do its thing, printing layer by layer. It was a long process and the printer took over five hours to finish, but we are very proud and satisfied with the end product.


Top view.
Bottom up.

Sarah planning to do something sinister with our new creation.
I showed photos of our object to my friends and almost all of them said it looked like a bunch of butt plugs. I can assure you that was not our intention, butt you can use it however you like.

This has been a very enjoyable and memorable experience. We have encountered some challenges such as coming up with hybrid designs without putting things on top of each other, remembering how to use Meshmixer, and exporting other file types instead of the G-code. We also had to reprint our model as Sarah accidentally broke it. All in all, I gained some valuable knowledge through this group project and I hope to have more opportunities experimenting with 3D printing in the future.

Tuesday, November 13, 2018

[OBDF 110] 3D Printed Hollow Form Object: Concept Generation

New blog for a new project! This time we will be working with 3D printing technology. Our instructor, Bryan, has given us an intriguing lecture on the history of 3D printers. Before we can get our eager hands on an actual printer, we have been asked to come up with at least 10 concepts for hollow form vessels using Rhino. There are only two constraints for this assignment, the vessels must be single perimeter and self-supporting. To my understanding, this means if I was to print any of my designs, the printer should be able to print the whole object without any support material in one attempt, thus it should function with minimal post-processing. Bryan has also demonstrated how to avoid printer failures by showing us examples of 3D printed objects that had a lack of self-support.

Things I tried to avoid when generating the following concepts:
  • using steep angles
  • overhanging designs e.g. candy cane
  • large amount of flat surfaces stacked on top of each other
We were also given a couple of new commands to try out in Rhino: Sweep1 and Revolve.

1) No new commands, just Loft, NonmanifoldMerge, CreateRegions, etc.


Top view
2)


3) First time trying Revolve and JoinEdge, also used ChamferEdge plus Mirror, etc.


4) RoundHole

5)


6) First time using Sweep1


Front view

Top view
7) A vessel vessel


8) An homage to Art History 101 and the Ancient Greeks

Kylix. 440BC-430BC (circa). Red figure pottery. 12.7 x 33cm. Attica, Greece


9)


10)


I am genuinely excited to receive feedback on these concepts as well as curious to find out which ones are better suited for 3D printing. I look forward to refine one of these ideas and advance to the next stage of the project.

Tuesday, November 6, 2018

[OBDF 110] Papercraft: Final Revision

The final assignment of the Papercraft project requires us to revise our prototypes from the previous assignment. We have been given time for some in-class peer critiques on our prototypes. I have received positive and constructive feedback. In order to improve my craft, I have been informed to glue double faces for a more sturdy build. I should also make extra faces/tabs to glue the neck/arms/treads in a more effective and efficient way. Furthermore, I have been challenged to add details to the object such as WALL-E's hatch and use cardstock instead of drawing the eyes with a marker.

I increased some of the lines' thickness in order to see it clearer on the cardstocks.
After taking the feedback into account, I decided to make a WALL-E and EVE mashup. I redid the unfolding in Rhino plus added more as well as larger tabs to make cutting and gluing easier; thus, reinforcing the structure of the object. I knew I had to scale up the entire design because I wanted to put a boot with a plant inside of it, much like in the film, for additional detail.

When unfolding, I tried to plan the most effective and efficient way for the folding plus gluing process and not just the easiest way to unfold, e.g. tabs and extra faces. I did not model the plant in Rhino because of its small and organic form.

The templates and all of the tools required to score, cut, fold, and glue.
I cut the longer sides with an x-acto blade (thanks Josh) and the shorter ones with scissors.

Above are two Rhino renderings.


Finally, on the left, is my creation of WALL-EVE and next to it, is my prototype of WALL-E. I was pleased with the result and the fact that the critiques have contributed to the success of constructing my object. I found making WALL-EVE so much more simple than dealing with the minuscule tabs I made for the prototype.

I hope you enjoyed my process as much as I did working on this assignment. I am looking forward to see what we have in store for the next project!